I absolutely love repurposing anything into something else useful or cute. Today, I want to show you how to make headbands out of a t-shirt. I always keep old t-shirt that my husband is giving up, ones that have a stain on it, or ones that don’t fit anymore.
So, grab your supplies, sit down, and get ready to creates something for a sweet little girl in your life (or for yourself!) And if you have a little extra time, keep reading to see how to make a super cute and chic container for your headbands and other hair doodads.
Here’s what you’ll need for the headbands:
- an old shirt
- scissors
- fabric glue or needle and thread
…yep that’s it! you can always add an embellishment of your choice, but it’s not needed.
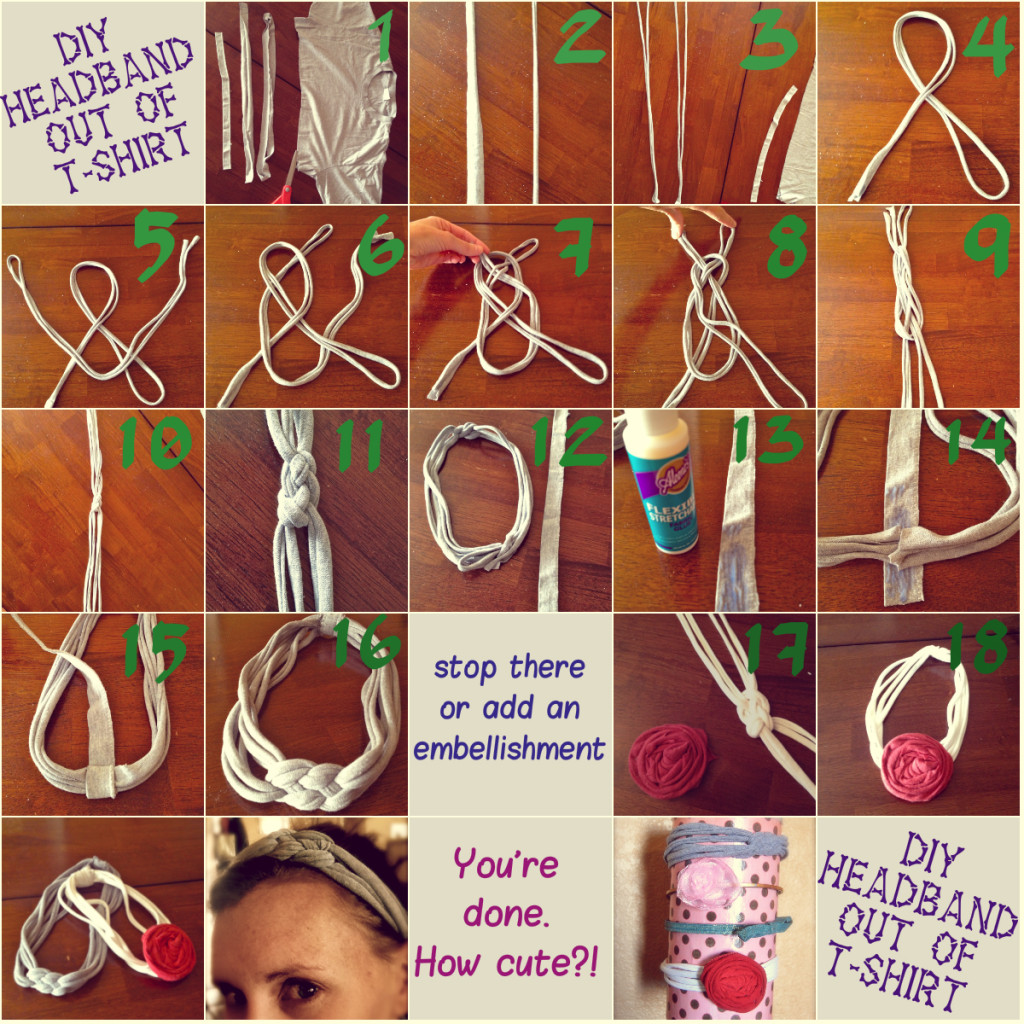
Step by Step instructions that follow the images above:
- cut the body of the shirt into long strips (see image #1)
- pull and stretch the strips from both ends (don’t worry it won’t rip)
- make two sets of 2-3 strips each (or just use two long strands folded in half)
- make a loop with one set with the right side over the left
- make a smiley face with the other set on top of the loop
- tuck both ends of the smiley strand under the loop strand
- take right end of smiley and go over, under, over
- grap all 4 ends and begin to pull
- keep pulling, adjusting the knot as you go
- pull however tight you’d like
- adjust your knot
- lay in a circle and make your ends line up (you might have to snip off extra material depending on how large you want the band to be)
- grab another piece of t-shirt that hasn’t been pulled (i used the hem of the shirt) and put fabric glue on it
- place it below where the ends meet up
- wrap it around a time or two. you can stop here, or stitch it for reinforcement
- you’re done!
- or add some flower or other embellishment over the knot. I just glued my t-shirt flower to the knot.
And if all that still doesn’t make sense, check out this video from the blog where I learned to see it done in real time.
Now sit back, admire your cute headband. Try it on. Or display in on a homemade hair doodad stand.
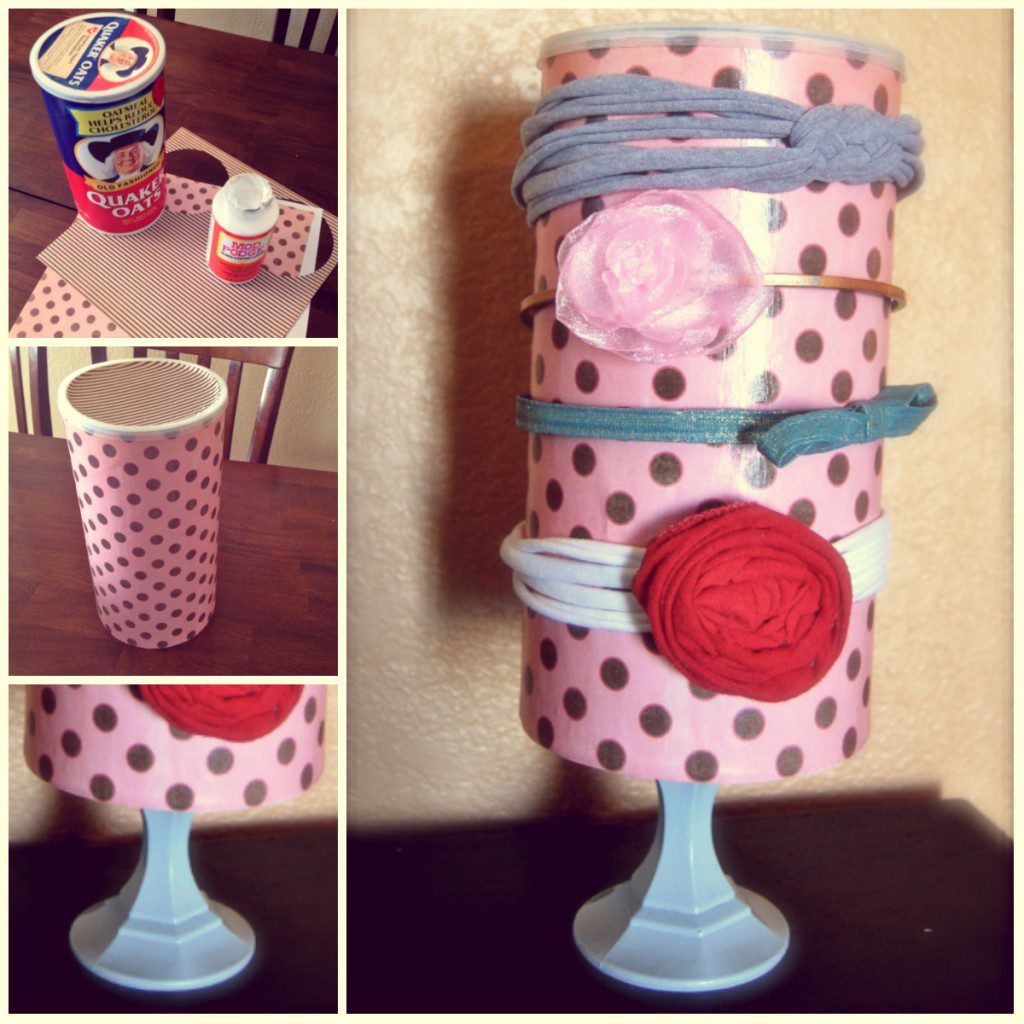
I made this cute hair container in about 30 minutes.
What you need:
- Oatmeal container (or one like it)
- Scrap book paper
- Double sided tape or spray adhesive
- Stand (I used a candle stick holder that I got at the dollar store and spray painted)
- Super glue or hot glue gun & hot glue
- cut paper to fit around the oatmeal container
- attach the paper with double sided tape or spray adhesive
- cut a circle of paper to fit the lid and attach the same way to the top of the lid
- glue a base to the bottom of the container using super glue or hot glue
Fun, Cute, and Functional! Headbands go on the outside and other hair accessories go inside.


