


Fall is finally here! And while we may not get to have the full fall experience here in AZ, it has brought with it (slightly) cooler temperatures, back to school, and of course, pumpkin spice lattes. Maybe it’s the former teacher in me, but fall also brings the desire to set up some fun craft activities for my kids. Unfortunately for me, my oldest son (4) has never had a particular love for crafts, my daughter (2) is still a bit young for many art activities, and we have a brand new baby at home, making time and energy tight. However, over the past years as a mom, I have discovered a few tried and true activities that can be used over and over for all seasons/themes. They are simple enough for the youngest child, but engaging enough to keep the reluctant crafter involved.
Sun Catchers ~
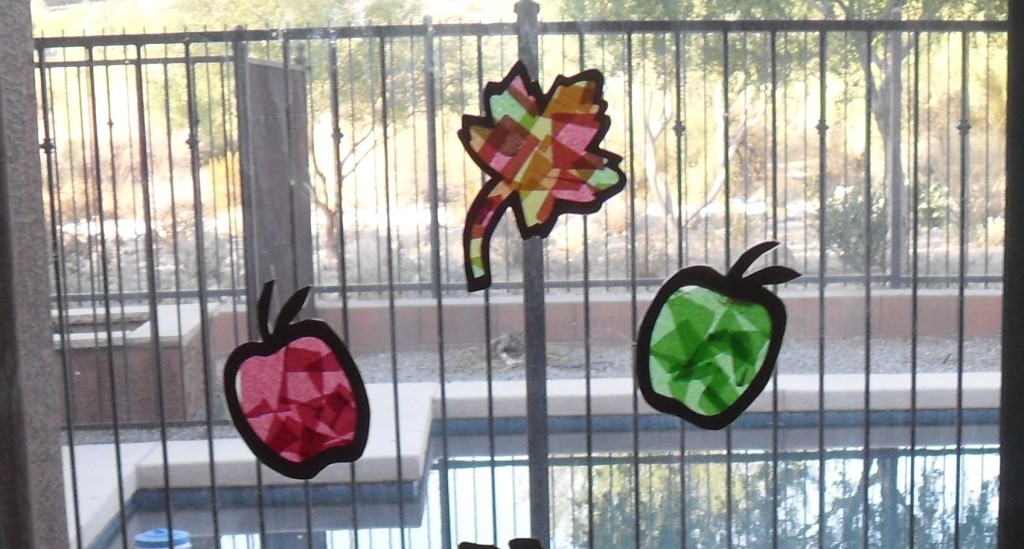
I love having our slider door decorated for the season/holiday, especially with child-created art. Sun catchers are a beautiful way to brighten up a room and they can be created at any age. Here’s how to make one:
- Draw a shape on construction paper that you would like to create (try leaves or apples for fall, ornaments for Christmas, flowers for spring, etc.)
- Double the paper up and cut the shape out. Then cut out the inside, so that you are left with an outline of the shape about ½ inch thick or so.
- Stick one of the shapes on a piece of contact paper.
- Cut out a bunch of squares of tissue paper in various colors, depending on what you want to create.
- Have your child use the tissue paper to fill in the inside of the shape.
- Place the second shape right on top of the other, and then cover with another piece of contact paper to seal it in.
- Cut it out and hang it on the window!
*For a simpler version, simply have your child cover a piece of contact paper with various colors of tissue paper, seal, then cut out any shape you want!
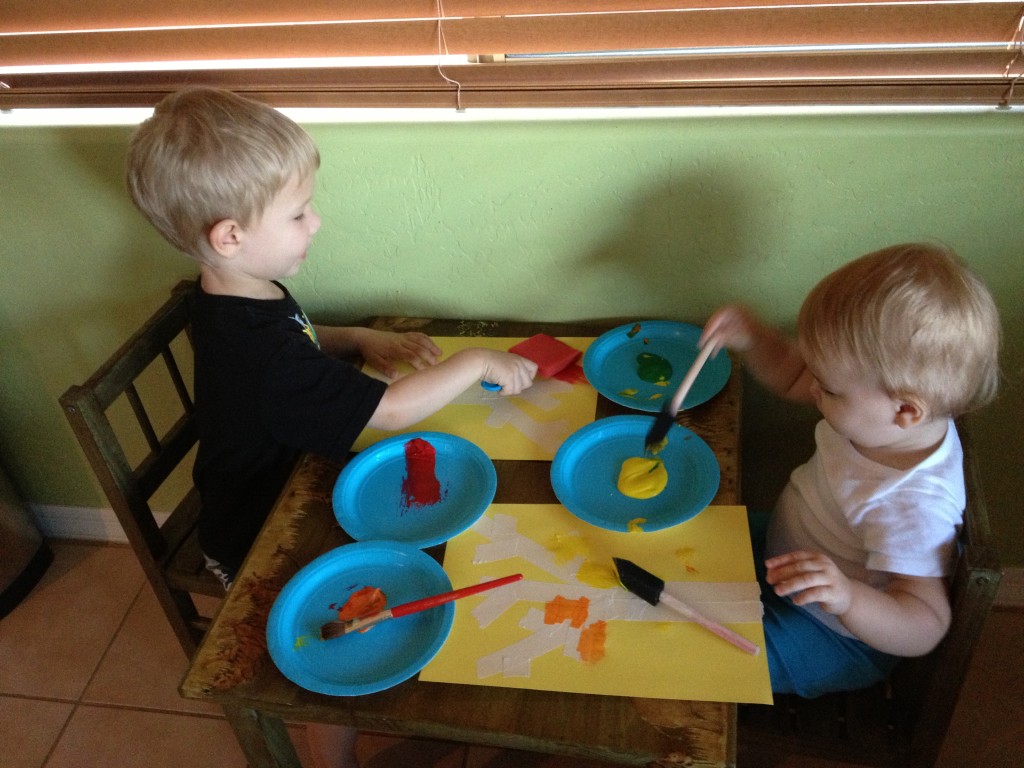
Painter’s Tape ~

I love painter’s tape for so many reasons, but one of my favorite ways to use it is for painting (kid type painting, not just wall painting!). Most painting with young kids is all about the process, not the product, and I love that. However, every once in a while, it’s fun to make a painting that actually looks like something. Enter painter’s tape. Start by taping any type of design onto a piece of white paper. Again, vary it according to season or holiday, or I’ve even seen it with names on Pinterest. This will work best with a shape involving straight lines, but you can create curves by using a lot of small pieces of tape. Once you have your design taped, hand the paper to your child and let them go to town! This is great with finger paints or paint brushes, and works best when they cover the entire page. After they’re done painting, let it dry completely, then pull off the tape, and voila! You will have a beautiful painting that was all about the process for your kiddo, but still is a great product to hang on display.
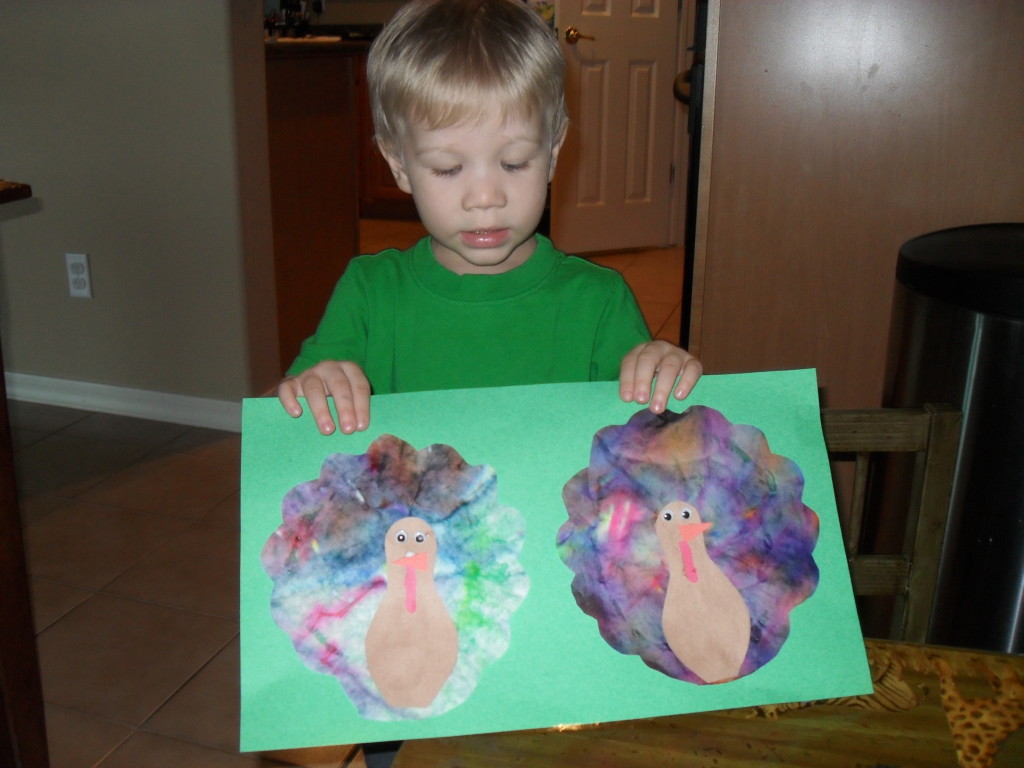
Coffee Filters ~

I can’t remember where I first heard this trick, but coffee filters are a fun, cheap, and easy material for art projects. They are nice and thin so paint/markers bleed well on them to create a tie dye effect, they cut easily, and they’re already round so very conducive to making many different objects. There are two different ways I think work best for coloring them. One is to just use watercolors. As you paint them with the watercolors, it will naturally bleed together, creating that beautiful tie-dye look. The other way is multi-step, but I think it’s even more fun. First color the coffee filter with markers. You don’t have to fill it completely in (I actually think it works better if you don’t), but you will want quite a bit covered. Try using all different colors if you want a rainbow look, or different shades of the same color, depending on what you’re making. After you’ve colored it, take it outside along with a spray bottle and have your kids squirt away! I think that is the best part J . The water will let the colors bleed together, once again giving it that tie-dye effect (make sure to put something underneath the coffee filters so the markers don’t bleed on the table/ground). Let them dry, and then depending on what you are making, cut them into the desired shape. Like the sun catchers, these make a beautiful decoration to hang in the windows, and can be adapted for the changing seasons. Try snowflakes in the winter, eggs for Easter, or shamrocks for St. Patrick’s Day.
Salt Painting ~
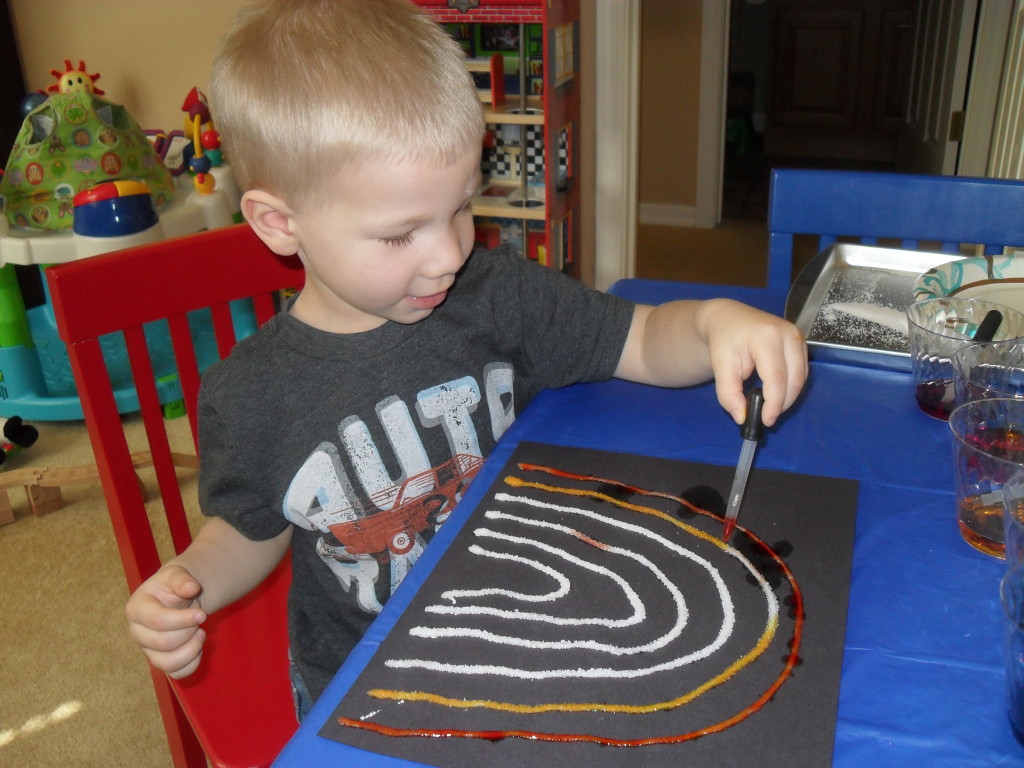
I’m not sure who is mesmerized more by salt painting, me or my son. The first time we tried it, he finished his first one, and asked to do another! This may not sound like much, but he is generally a 5 minute crafter – excited initially, but after a few minutes he’s ready to move on, so to ask for more was quite unheard of. I couldn’t blame him because it really is cool. Here’s how to do a salt painting.
- Using glue, draw a design on a piece of paper. For younger children, I would do it for them if you’re creating something specific, but older children can do this on their own. You can also just let younger kids have fun with the glue and not even worry about creating a specific image.
- Sprinkle salt over the glue and shake off the excess. Any old salt should work.
- For the actual painting, you can try it two different ways. One would be to use watercolor paints and a paint brush. Just lightly touch the paintbrush to the salt. The second way would be to use liquid watercolors, or simply water colored with food coloring, and a small eye dropper. Drop just one or two drops at a time onto the salt.
- Watch what happens! It is so fun to watch the color spread throughout the painting.
*Note – The colors don’t tend to last well on these and they are difficult to hang up, so this is definitely more of a process project
Play Dough ~

What child doesn’t love play dough? Well, actually my child didn’t for quite a while because he wasn’t big on touching different textures, but now he loves it. If you’ve never tried homemade play dough, it is really quite easy (although not quite as easy as opening a can, so we definitely like to do that sometimes too!). There are a bunch of different recipes out there, some where you have to cook them, some that you don’t. One of the best things about making your own play dough, is that you can add your own scents and colors to it. This makes it easily adaptable to any season it might be. Add some orange food coloring and pumpkin pie spice in the fall, shimmery glitter to make “snow” play dough in the winter, or peppermint and red food coloring for Christmas. Throw in some seasonal cookie cutters and a few props if you want, and you have an easy activity that can be pulled out all season long.
Cooking ~
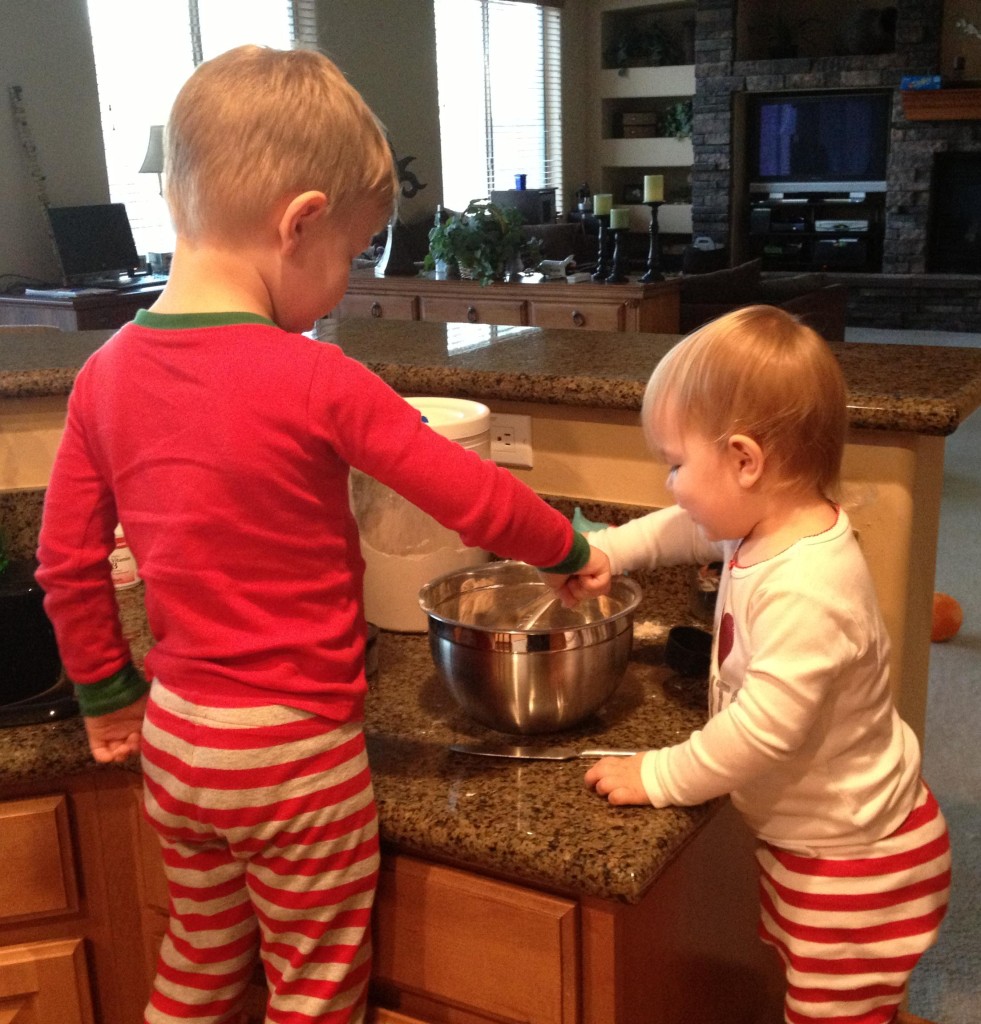
So this isn’t exactly a craft, but I wanted to throw it in there because it is one of our favorite seasonal activities to do together. I love finding seasonal recipes for us to bake together (especially right now in the fall with so many apple and pumpkin recipes out there!). Having your kids help you measure, pour, stir, and of course, eat is just one of those memory making activities. As much as I love trying out all of these yummy recipes, my waistline doesn’t, so whenever we cook, we try to cook for someone. This way, we can eat a few, then pass along the yumminess to someone else, and as an added bonus, your kids learn the joy and pride that comes along with giving!
Sensory Bins ~
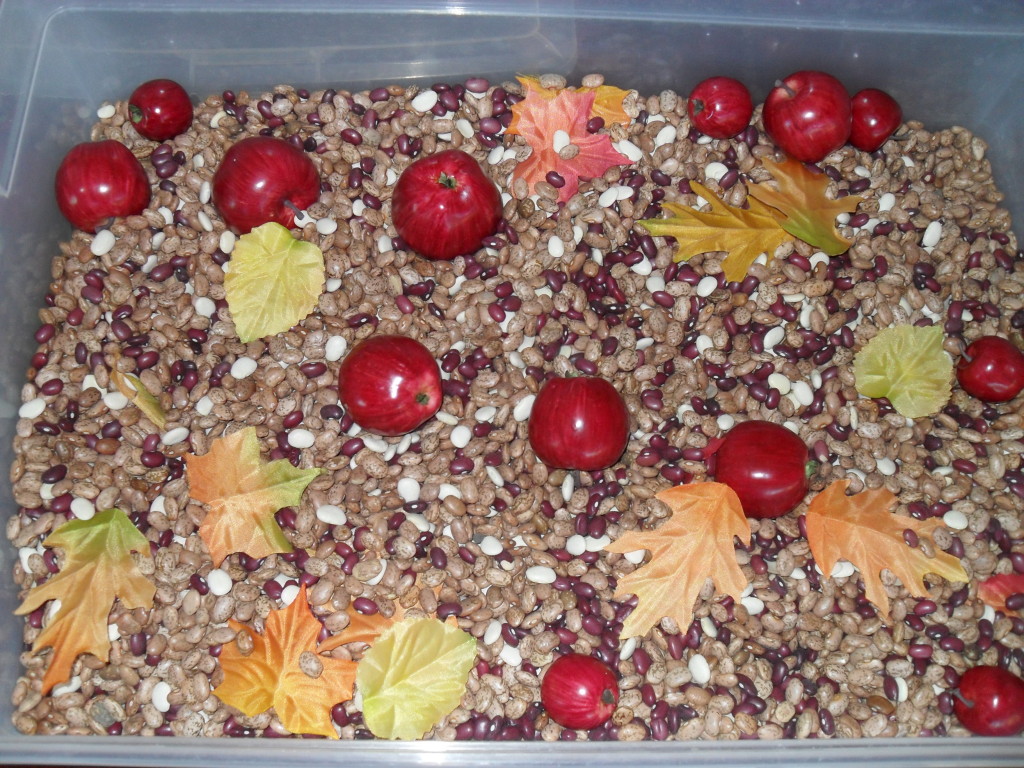
Ok, I know I bring these up all the time, but this is still one of our favorite seasonal activities. Check them out here for more info.
How about you? What are your favorite go-to arts and crafts activities for your kids?


